The tooth fairy laughs she stealthily exchanges a small handful of coins for the lone tooth under his pillow. The thought just occurs to her that this boy worked so hard at twisting out his not-quite- ready tooth this evening because it is book fair week at school. And while his mother may consider the KCLS library their second home, she does not GIVE her children money for the book fair. She does, however, provide them with ample opportunity to EARN book money- particularly during book fair week- but apparently it is easier to rip out a tooth.
Wednesday, January 30, 2013
Tuesday, January 29, 2013
Galline Cornish al limone (Cornish Hens with Lemon)

What a wonderful surprise tonight. I wanted something that would require minimal effort. After all, my darling husband was taking up the floor space in the kitchen, trying to fix the trash disposal that he managed to break while I was away. I needed something I could prepare in a hurry and get out of his way. The last thing anyone wants is to climb over someone in the kitchen. I sensed it would be a frustrating evening.

Thank goodness, I happen to come home with these Cornish Hens. Came across them in the market and thought what a perfect meal requiring minimal effort. I grabbed my glass of wine and spent the extra time going through the days mail, as far away from the kitchen as possible.
There is something very comforting and inviting when the house smells of Lemon and Rosemary. It was just what we all needed.
Ingredients: 2 Cornish hens (1lb,2oz each approx).
2 large cloves of garlic (one smashed piece in each cavity to be discarded later)
One large handful of Rosemary (preferably on the stem)
2 Meyer lemons
2 Teaspoons of salt
1 Teaspoon of pepper
1 pound of baby carrots (Or any combiniation of potato's, carrots cut into similar size), in a bowl, tossed with a tablespoon of olive oil and a pinch of salt.
One cup of white wine
Preheat your oven to 375F
One baking dish to fit your 2 Cornish hens nice and snug. (They will shrink some while cooking).
Method: Clean and rinse your Cornish Hens, pat dry and set aside.
Insert a handful of Rosemary (Or several stems), garlic, half of a lemon, into the cavity of the hens. Pour 1/2 glass of white wine over each hen. Use your other half and squeeze the lemon all over the outside of the hen. Add your salt and pepper to all sides of your hens.
Place your Cornish Hens into the baking dish. Place several stems of Rosemary on top of each hen.
Place in a preheated oven for One hour and 30 minutes. After the first 30 minutes of cooking, place your cleaned, baby carrots right into your baking dish alongside your Cornish Hens.
Continue baking for the additional time. If your Cornish hens are slightly smaller, decrease your cooking time. On average, Cornish hens are a little on the small side and just enough for one. You want your hens golden and crisp on top. Keep on eye on your oven during the last few mintues as oven temperatures will vary. Your carrots should still have a soft but slight crunch.
Make appropriate adjustments for convection ovens.
My husband never fixed the disposal, but we had a delicious, relaxing dinner and just in time. Time to call the plumber.
Buon Appetito!
Discard your cooked/dried/Rosemary in the pan before serving. Add some fresh garnish.
Monday, January 28, 2013
Lite Cheddar Broccoli Soup

For the last few weeks my part of the world has been enduring freezing temperatures By freezing I mean highs around 15 degrees Fahrenheit. If anything says soup weather, these temperatures sure do! So, for this month's Secret Recipe Club I chose this Light Cheddar Broccoli Soup from I Am a Honey Bee. I loved that Nicole, the blog's author writes a blog with recipes, restaurant reviews, and scrap booking posts. It is creative and fun, and I loved checking in to see what new surprises might be posted.
On to the soup! Not only was this soup warm on a cold winter's day, it was great to try a recipe for a family favorite that is lower in fat and calories, but full of a TON of flavor. It was easy to make, and it took little time or effort. I stayed to true to the recipe and didn't make any changes other than the type of low fat cheese I used. ENJOY!

Lite Cheddar Broccoli Soup
Recipe Source: I Am a Honey Bee
2 heads of broccoli
3 cups skim milk
2 cups chicken stock/vegetable broth
1 large onion, finely chopped
2 tablespoons butter
1/4 cup whole wheat flour
8oz of shredded reduced fat cheddar cheese
3 cups skim milk
2 cups chicken stock/vegetable broth
1 large onion, finely chopped
2 tablespoons butter
1/4 cup whole wheat flour
8oz of shredded reduced fat cheddar cheese
Finely chop the broccoli including the stems. In a large pot, combine the milk broccoli and simmer about 10 minutes or until the broccoli is tender.
Heat a small pot, and then sauté the onions with 2 tablespoons butter. When the onions are soft and translucent, sprinkle the flour in and stir with a wooden spoon until the flour is evenly coating the onions. Add the broth slowly and mix until all lumps of flour are broken down.
Add the broth mixture into the pot with the broccoli and milk. Allow to heat through. Slowly add the cheese until well combined. Serve immediately.
Farm Girls
Quote of the Day: A poem from the book Farm Girls by sisters Candace Simar and Angela Foster
In the Middle of the Night
Hunkered at the kitchen table
plaid bathrobe and red slippers
thick glasses resting on his nose
smoke curls from dangling Camel
he sucks deep
Engrossed in turning pages
he doesn't turn his head, doesn't know I'm there
doesn't notice a mouse scurry under the refrigerator
What are you reading, Daddy?
He looks then, turns the book upside down on the table
black letters bold on the book's spine
Of Mice and Men
by Candace Simar

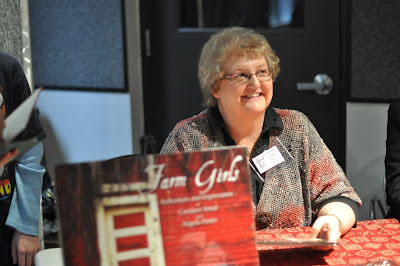
Candace Simar at the book signing and poetry event for Farm Girls
Krista, from Blue Cottage Agency, and the Crossing Arts Alliance in Brainerd put out an All Call to local poets for a Poetry on the Wall experience. Here's a mug shot of what the walls look like and the people who made it happen.

Chiranjeet, Krista, Richard, Millie, and Zishan.
Thanks for all the work you put into this event!

Photo by Richard Andrew
On Saturday, January 26, 2013, I walked into the packed room of the Q Gallery in the Franklin Arts Center, standing room only, and listened as these brave poets got up and read their work. Some of them said that they'd never read their poems in public before. I'd read a few of the poems as I walked around the room the other day, but hearing them read out loud gave them life. I was so proud of my fellow artists.
In addition to the poetry readings, Candace Simar and her sister Angela Foster shared from their recently published collection of poems and essays in their book Farm Girls. Angela's poem, Secret, received a few chuckles, which starts out, I love Eminem, the bad-boy rap singer. A middle-aged farm woman from small town Minnesota is not supposed to enjoy rap music. But I do.
You'll have to buy the book to read the rest. It's great! You can find a link to it at the authors' websites or Blue Cottage Agency.

Candace, Angela, and Mary
Also, what grabbed my attention from the writing of these sisters is their dreaming of one day sitting on Oprah's couch, reliving the antics of growing up on a farm in Minnesota, becoming writers, and sharing their poems and stories with the world.
Dare to dream, folks. Dare to put the words on paper, or create your images. You never know who might end up on Oprah's couch!
Go. Create. Inspire!
Journaling Prompt: Where did you grow up? Recreate it on paper or in your art.
Honey Oat Granola Bars with Dried Blueberries . . .

This may well be the first time I've ever used dried blueberries in a recipe. In fact, I almost forgot altogether that I had these Michigan blueberries on hand. I got them last summer from a spice-scented little shop up north. It's crammed with cooking gadgets, household antiques (not for sale), and interesting ingredients. Surrounded by tall trees, the shop's leafy exterior is whimsically cluttered with garden kitsch, and they sometimes have a sign out front that blatantly prods passersby to visit, reading, "If you have a kitchen, get in here!" Tourists oblige. It's just that kind of place.

Each time I'm in the vicinity, which is typically two or three times a summer, I can't resist wandering in. I've acquired all sorts of culinary doodads there over the years, most of them distinctly non-essential but fun to have. Items like oddly-shaped muffin pans, a cupcake corer, a couple of scissor-like cherry pitters, tiny tart pans, two or more pastry cloths, a rolling-pin stockinette (just the word "stockinette" reminds me of my childhood), spice mixtures, and uncommon jams. It's just not the kind of place you can dash in and out of. You need lots of time to browse. It's a summertime kind of place.
And on this ice-coated day, granola bars, for whatever reason, kind of remind me of summer. Oh luscious, lovely summer . . . warm, sunny summer. Less than five months to go. We can wait . . . I suppose.
About this recipe . . .
Adapted from Kim Boyce's beautiful book, Good to the Grain: Baking with Whole-Grain Flours, these granola bars are hard, crunchy, and slightly chewy. I made a few minor adjustments to the formula but nothing radical: I used dried blueberries instead of raisins, substituted toasted wheat germ for a portion of the flaxseed meal, and threw in a modicum of sunflower seeds along with a pinch of ground nutmeg. I'd definitely make these again.

Honey Oat Granola Bars with Dried Blueberries
Yield: 16 squares (made in a 9" x 9" pan)
1/2 cup unsalted butter, melted
2 cups rolled oats (I used a mixture of both old fashioned- and quick oats; just what I had on hand.)
2 tablespoons wheat germ, toasted (To toast, spread on a small cookie sheet; bake in 325 oven for 10 minutes, just until slightly darker in color and nutty smelling.)
1 quarter cup, plus 2 tablespoons flaxseed meal
3 tablespoons sunflower seeds (I used roasted and salted sunflower seeds.)
1/2 teaspoon cinnamon
1 pinch ground nutmeg
1/2 cup dried blueberries (If you don't have dried blueberries, try raisins or dried cherries/cranberries instead.)
1/2 cup honey
1/4 dark brown sugar
1 tablespoon molasses, unsulphured
1 teaspoon salt (I used coarse sea salt.)
Preheat your oven to 325 degrees. Spray a 9" x 9" square pan with vegetable spray, or butter it liberally ((I used a metal pan, but a glass baking dish is fine too, and I used the spray instead of butter).
Melt the butter in a large, heavy pot (I used a dutch oven). Add in the oats, and stir to combine with the butter. Cook over a medium flame for about six minutes, stirring frequently. You want the oats to turn a little darker.
Dump the oats into a large heat-proof bowl. Wipe out the pot and put it aside/back on the stove; you'll use it later to make the syrup.
Add the toasted wheat germ, the flaxseed meal, the sunflower seeds, the cinnamon, and the nutmeg into the bowl with the oats. Stir well to combine, then stir in the dried blueberries.
For the syrup, heat the honey, brown sugar, molasses, and salt in the pot over a medium flame. Stir to combine and then let the mixture simmer at a low boil for approximately 6 minutes. (It needs to boil that long, according to author Kim Boyce, in order to give the granola bars their chewiness.)
Pour all of the syrup over the dry ingredients, scraping as much as possible out of the pan. Working quickly, use a flexible rubber spatula to mix in the syrup (you can butter/spray your spatula if you like; helps facilitate the stirring). Keep mixing until everything in the bowl looks like it's well coated with the syrup.
Scrape the granola into your pan and, with buttered hands, evenly and firmly press it down (it will still be kind of hot, so be prepared).
Bake for 25 to 30 minutes (rotating the pan once, after about 13 minutes), until the granola looks nicely shiny and darker than when you put it in the oven. Let the bars cool in the pan, on a rack, for 10 minutes, then cut them into 16 squares while they're still in the pan. (If you wait too long to cut them, you won't be able to neatly do so since they'll become too hard.) Use a rigid metal spatula to remove them from the pan, piece by piece, to finish cooling on the cooling rack.
Store in an airtight container, at room temperature.

(If you'd like to comment on this post, or to read any existing comments, please click on the purple COMMENTS below.)
Saturday, January 26, 2013
Baked Ham and Egg Cups

Let me tell you a secret. I didn't used to eat breakfast. I know, I know, it is the best meal of the day. I always made sure my kids ate it every morning because I wanted them to have a good start, but I just couldn't find the time to eat it myself. Instead, I would drink my soda and grab a snack about 11 a.m. to hold me over until lunch.
On the rare occasion when we made a big breakfast, or went out to eat breakfast, my go to meal was ham and eggs with hash browns and sourdough toast. It was always wonderfully delicious and perfect in every way--at least in my opinion. With my commitment to eating healthier this year, my ideal breakfast
ins't a good option anymore.
I know that I need protein in the mornings. I have been eating a lot of hard boiled eggs and fruit, which gets a bit boring. Insert this recipe for Baked Ham and Egg Cups, and the boring stops. They have the flavors of my favorite breakfast, but without the additional fat from frying everything in oil or butter. In fact, the original recipe states they come in at 100 calories each (depending, of course, on the type of ham and toppings you use.)
I have to say I'm in a bit of breakfast heaven right now. They little babies are delicious. The eggs are soft and full of flavor from cheese and ham. But, my favorite part is the crispy edges that the ham gets from the heat of the oven. Oh, my goodness they are good!

Now, some of you might be thinking the same thing I thought when I saw these for the first time, "it looks complicated to make." But, the good news is that they aren't hard at all. They are easy, and relatively quick to assemble. Not to mention, they can be customized to your tastes so everyone in the family gets eggs their way without a lot of hassle. If you want them runnier cook them less, I prefer mine almost completely set to ensure the whites aren't slimey. I think I might try them for a light lunch with a green salad very soon! Please, go try them, and ENJOY a delicious breakfast!

Baked Ham and Egg Cups
Inspiration: The Nest
Eggs
Thinly sliced ham
Salt/Pepper
Parmesean cheese (or cheese of your choice)
Green onions
Heat your oven to 375 degrees.
As the oven heats, lightly spray your pan with non stick spray. Line a muffin tin with 2 slices of ham, slightly overlapping them. Break one egg into each muffin cup. Sprinkle with salt, pepper, and cheese.
Bake for 10-18 minutes depending on your oven, the pan, and how well done you want your eggs. I set my timer for 10 minutes and then kept an eye on them until the whites were firm.
Gently remove from the pan, top with green onions, and serve with any side you wish! ENJOY!

Saturday, January 19, 2013
Review of Pinocchio at The Children's Theatre Company in Minneapolis
Quote of the Day: What's easy to get into, but hard to get out of? Cricket asks Pinocchio. The answer: Trouble! And, as you probably already know, Pinocchio finds himself in all sorts of trouble on his journey to go to school and learn how to be a real boy.


Gepetto chisels a boys puppet out of a block of wood.
There is a real boy in here somewhere.
All photos provided by the Children's Theatre Company for press purposes.
Dan Norman Photographer
Elise Langer playing the worker who portrays Pinocchio.
Pinocchio and the bullies (Bradley Greenwald and Dean Holt)
(Elise Langer and Maggie Chestovich as the workers telling the story of Pinocchio)
Who do you trust when you are a wooden puppet on a new adventure?
Maybe not a cat and a fox.
Sometimes, a puppet can feel lost in a big, scary world.
Feeling real love and caring for someone else means being a real boy.
When you go to see Pinocchio at the Children's Theatre in Minneapolis, you might think that they aren't ready for you, yet. The set is paint cloths and scaffolding, with buckets and brushes lying around. The actors are in work clothes and seem distracted until you arrive with your energy and eagerness to watch them tell a story. They look at you. They listen to your cries to tell the story, and they hear you taking in your breath as the magic unfolds. They hear your giggles and encourage you to help Pinocchio on his way. With the tools used to build a set, the actors find props and instruments, costume pieces, and tiny objects that can produce big whales. The show is engaging and lively. The actors feed off the energy of the audience from preschoolers to grandparents. I heard kids who were so involved in the story that they shouted out encouragement and advice. It was delightful. Take the whole family. I brought three teenage boys, and they liked it. I saw smiles on their faces and heard them laughing. The message of Pinocchio and his journey speaks to all of us as we try to find our path, get distracted from our goal, and even lose our way at times. To be a real boy (or girl) you have to feel real love for the people who love you back.
I think love is the theme of The Children's Theatre Company. The actors seem to truly love telling stories. The audience loves to watch it. All of the people behind the scenes love to create the magic for us. At the end of the show, one young audience member shouted, "Tell it again!" And, they will, from January 15 - February 24, 2013.
Go. Create. Inspire!
Journaling Prompt: What goes up and down, but never moves? Go to Pinocchio to find out the answer!
Friday, January 18, 2013
Review of Long Day's Journey into Night at The Guthrie
Quote of the Day: From deep personal pain comes great literature and art. My own observations as I watched A Long Day's Journey into Night by Eugene O'Neill, currently playing at The Guthrie Theater in Minneapolis, January 12 - February 23, 2013.

John Skelley (Edmund Tyrone) and Helen Carey (Mary Cavan Tyrone) in the Guthrie Theater's production of Long Day's Journey into Night, by Eugene O'Neill. Directed Joe Dowling, set design by John Lee Beatty, costume design by Ann Hould-Ward and lighting design by Christopher Akerlind. January 12, 2013 - February 23, 2013 on the Wurtele Thrust Stage at the Guthrie Theater, Minneapolis. Photo by Michael Brosilow.
Eugene O'Neill won his fourth Pulitzer Prize for this play which was produced posthumously. He asked that it not be produced until 25 years after his death because of its autobiographical nature, but Stockholm's Royal Dramatic Theatre didn't wait that long. They produced it in 1956, just three years after O'Neill's death.
This is a heavy drama. The "Tyrone" family is a mess. At first, they try to pretend that "It's all good." That persistent cough and loss of appetite, "It's just a summer cold." Oh, and if you drink more than your dad thinks you should out of his whiskey bottle, just add a little water to bring the liquid back up to the mark, "He'll never notice. He'll be too sauced himself." And, mom drifting away, thumping around at night, and missing a few beats here and there, well that's just due to loss of sleep because dad snores and Jamie snores and she's worried about Edmund's cough.
The Tyrone family is in denial at the beginning of the play. As the day progresses and the addictions become more apparent, so does the reality that they're trying to avoid.
Helen Carey who plays the mom Mary Cavan Tyrone is amazing. From the moment she walked onto the set, I knew she was Mary Tyrone. I felt her anguish. I never once thought of her as an actor portraying a character. She was Mary Tyrone, gripped by personal tragedy and depression, coping with abuse of perscription drugs (turns out to be morphine), and drifting further and further away from her family.
I don't know if it was due to the directing, the costuming, or the role interpretation, but James Tyrone never came across as a retired and frustrated actor. He seemed more like a crabby, old businessman who was as tight with his money as he was with his affection. The boys were swallowed up by their own illnesses, alcoholism and "Consumption" (tuberculosis), and angry at their father and disappointed in their mother.
The entire show is played out in a day, from the brighter lights at breakfast to the dimness of evening. Mary Tyrone comes out in the morning with the loveliest yellow skirt, still trying to keep grounded in the family. In the second act, she wears blue literally and figuratively and succumbs to her need to escape into her drugs, until the end when she emerges from the attic in a ghostly white dress. We know that she is but a spector of herself and floats out of the present and back to a time when she thought she was happy.
If you like realist dramas and the works of writers of the early 1900's, you will appreciate this play. It felt a bit long to me. Although I know that on the Thrust stage we can expect to look at the actors' backs from time to time, I felt like the staging of the scenes had the actors turned away from us too much (and I was in the center seating). This would be a great show for a college class to watch and discuss characters, personal pain, storytelling, and what works on a stage with today's audience.
A Long Day's Journey into Night is playing on the Wurtele Thrust Stage at The Guthrie Theater in Minneapolis through February 23, 2013.
Go. Create. Inspire!
Journaling Prompt: Have you ever watched a show where you wanted to offer some help to the characters in the end? I was ready to look up where the nearest AA meeting was, or suggest family counseling.
Wednesday, January 16, 2013
People like January?
Quote of the Day: from the great cartoonist Bill Watterson

This final strip and its message have stuck with me since its publication on Dec. 31, 1995. I loved reading Calvin and Hobbes in the local newspaper. They were always so full of imagination and adventure. When Watterson decided to end the strip, he left me with the image that the adventures continue and that the world is waiting for you to slide down it like a hill of freshly fallen snow. The image that it is a blank page also appeals to this writer and lover of art.
My blogger friend Jen Chandler wrote about loving Januauary. Is she crazy? I wondered. But, after I read her post, I had a newfound appreciation for January, that fresh start, the hills of fresh snow, beckoning me to make tracks.

Lake Carlos near Alexandria, MN
Here is an image I took of January in my area. The dead-looking tree in front of a frozen lake. And, yet, there is so much life within both. The tree is not dead. It is in its dormant, resting, stage. The old leaves have all fallen off. New ones will start budding in the spring. It will grow, stretch, and expand, the way our lives do as we open ourselves to new relationships and experiences. And, the frozen lake? Oh, there is so much life swimming around under there. Have you ever walked out on a frozen lake? I rode out on the ice in a vehicle for the first time this winter. I have walked on a lake, helped the guys fish, a little, on the frozen water, and I've skated. But, riding in a heavy vehicle on top of a deep lake...that's a moment to remember. And, for you folks reading this in warmer climates. The lakes really do freeze hard enough to drive on them. One of my favorite books North of Hope by Jon Hassler has some great scenes on the frozen waters of Minnesota.
May your January give you inspiration to make tracks into the new year!
Go. Create. Inspire!
Journaling Prompt: How do you really feel about January? Would you dare walk out onto the frozen lake, or ride on it?
Thursday, January 10, 2013
Primo Art Spa
Quote of the Day:

- May your coming year be filled with magic and dreams and good madness. I hope you read some fine books and kiss someone who thinks you're wonderful, and don't forget to make some art -- write or draw or build or sing or live as only you can. And I hope, somewhere in the next year, you surprise yourself.--Neil Gaiman
I think I used that one last year, but it's worth repeating, especially as my sister Joy and I are embarking on a new adventure. We've formed the Primo Art Spa to support artists in the area. For our first event, we'll be offering a class at the local pottery place, Glaze 2 Amaze. Here's the blurb.
Paint to Music at Glaze 2 Amaze, Thursday, January 24 from 6:30-8:00 pm. Joy Ciaffoni and Mary Aalgaard, who have started the Primo Art Spa to assist artists in the area, will be performing live music while you paint a plate and find out what kind of music brings out your red, blue, lemon, or your spice. Using a plate as a palate, you will create art that serves up memory, emotion, and delicious inspiration. You can use it as a plate for special occasions, a gift, or a memory piece for someone you love. Glaze 2 Amaze is located at 706 Laurel Street in Brainerd. Email primoartspa@gmail.com for reservations for this special event. Cost is $25.
If you're in the area, I hope you can join us! Joy and I make a good team. A couple years ago, we did a show called "Sisters." Here's one of my favorite photos from that event.
Paint to Music at Glaze 2 Amaze, Thursday, January 24 from 6:30-8:00 pm. Joy Ciaffoni and Mary Aalgaard, who have started the Primo Art Spa to assist artists in the area, will be performing live music while you paint a plate and find out what kind of music brings out your red, blue, lemon, or your spice. Using a plate as a palate, you will create art that serves up memory, emotion, and delicious inspiration. You can use it as a plate for special occasions, a gift, or a memory piece for someone you love. Glaze 2 Amaze is located at 706 Laurel Street in Brainerd. Email primoartspa@gmail.com for reservations for this special event. Cost is $25.

We were singing the song "Sisters."
Join us for an inspirational class if you can, or take a class wherever you live, or start your own...and
Go. Create. Inspire!
Journaling Prompt: Have you ever taught an art or writing class, or started something new?
New Years, Old Places, and Poppy-Seed Kaiser Rolls . . .

We spent New Year's eve in what was for us a most unconventional way. A relaxing and uncrowded way. That afternoon, the four of us took an unhurried drive to the tip of the thumb--Michigan's thumb, that is--to pay a short visit to Port Austin, a tiny village (the population hovers around 700) right on Lake Huron that has sentimental significance for my family. None of us had ever been there in the dead of winter and we were curious to see how it might look. On top of that, we had cabin fever after several days of post-Christmas lounging.

Port Austin is nestled right next to a federal Harbor of Refuge, which means it has a huge breakwater that makes it a haven for boating and fishing. During the warmer months it assumes the identity of a perky little tourist destination. But the rest of the time it's rather sleepy, and that's also part of its appeal. In the almost 45 years that I've been familiar with it, it has never become too big for its britches. It's not as if time there has stood still, but the best aspects of the place have been remarkably well preserved despite the passage of decades.

When I was a child, you could walk through the entire downtown in about five minutes if you didn't stop and linger, and it's still exactly like that. Each time we go there I'm relieved to see that pretentious boutiques and absurdly expensive restaurants haven't managed to swoop in and take over. It's a welcome-respite kind of a place. It may be humble, but it's certainly well loved. Port Austin is still an authentic place.

Upon arriving, we went first to the harbor and said hello to the lake. The wind there was fierce. We saw only one fellow, geared up for ice-fishing and heading out to a shanty not far from shore. My husband and oldest son strolled out onto the breakwater. Brave souls, those two. Back in the village, we were the only late-afternoon lunch customers in a cozy mom-and-pop place called The Stock Pot. After having a bite, we drove along the edge of the lake to a beautiful beach in a state park outside of town. We passed a man slowly walking his dog on the long road leading in but then we saw no one else, and we were truly alone.

We parked our car and hiked a short trail over the dunes before the water came into view. It was about half an hour before dusk. The clouds looked like thickly piled quilts. They were a hundred shades of wintery blue, as if they'd spent all of 2012 soaking up the colors of the lake.

The dune grasses were weighted here and there with snow, and the most exposed clumps of grass blew back and forth like smoothly brushed hair. On the shore, the sand felt stiff and almost frozen underfoot. Except for the constant wind, all was quiet.

It was the best New Year's eve. Somehow, for me, that simple experience emphasized the freshness of the approaching year. Our four-person celebration wasn't champagne drenched, action packed, or confetti strewn, but it was great. It was more than enough.

About this recipe . . .
What does all of the above have to do with today's kaiser rolls? Almost nothing, except that after we returned home that night I started jotting a list of items to bake in 2013. Kaiser rolls were first in line. I scanned my bookshelves for recipes before settling on this one. It's not overly involved and not too time consuming. It results in a slightly sweet, just-dense-enough sandwich roll. And, it doesn't require a pre-ferment/starter or any odd ingredients (unless you consider poppy seeds odd). The formula is adapted from Breads--one thin volume from a series of paperback cookbooks that was produced in 1985 by the California Culinary Academy.
And about that swirly thing . . .
The most interesting aspect of making kaiser rolls, if you ask me, is the business of creating the spiral design. There are a few differing schools of thought when it comes to achieving that distinctive kaiser swirl, and they're not all created equal.

There is the traditional and frustrating thumb-fold technique, which doesn't seem to have a big fan-club. This method involves keeping one's left thumb stuck inside a curled fold on the left side of a little circle of dough while the rest of the fancy folding is done with your right hand, until that left thumb is eventually allowed to leave its spot and that final fold is tucked "into the bottom dough under the first fold" (got that?). That old-school approach isn't too popular now, even among modern master-bakers like Peter Reinhart. He more or less tells readers of The Bread Baker's Apprentice not to bother with it (he actually compares it to "making a paper flower") and suggests the simpler alternatives of shaping the dough into knot rolls or using a special kaiser-roll stamp/cutter (see that blue thing below? . . . that's a kaiser roll stamp) to achieve the iconic shape.

Meanwhile, authors Stanley Ginsberg and Norman Berg of Inside the Jewish Bakery: Recipes and Memories from the Golden Age of Jewish Baking, agree that "kaisers are far and away the most difficult rolls to fold correctly . . ." but they go on to provide a murky black and white photo-tutorial for those folks who still want to try it. I found the tutorial only minimally helpful in attempting the tricky fold (thanks anyway, Stan and Norm).
The last option offered by the experts is to manually cut five curved slashes in each roll with a razor blade or a baker's lame (see that green thing above with a blade at the end? . . that's called a lame, pronounced like the name Tom). Hmm. So what's a home-baker to do? Well, I took a swing at all four shaping methods--folding, knotting, stamping, and slashing--with any number of variations thrown in before settling on the last option as the best. Yes, I had the most success with the slashing method. (Should I admit that I did the slashing with that scalpel-like tool while holding each dough ball in the palm of my hand? Probably not. I should just keep that to myself, lest I be considered suicidal.)
In any case, whatever shaping technique you decide to use, expect a yummy roll. That's what really matters.

Poppy-Seed Kaiser Rolls
(For a printable version of this recipe, click here!)
Yield: 12 sandwich size rolls
1 and 1/2 tablespoons instant yeast
2 cups warm water
1/4 cup granulated sugar
2 teaspoons fine sea salt
1/3 cup canola oil
6 to 6-and-1/2 cups unbleached all-purpose flour
Egg white from one large egg, mixed with 1 tablespoon of water
Poppy seeds (I'd have more than necessary on hand if I were you; you might actually use half a cup or less, but don't skimp. If you can't find, or you don't like, poppy seeds, try sesame seeds.)
In the large bowl of your mixer, using the paddle attachment, mix the water, sugar, salt, and oil on low speed just until combined.
In a separate mixing bowl, combine four cups of the flour with the instant yeast; stir or gently whisk in the yeast. Add into the liquid ingredients.
Still using the paddle, mix on medium speed for five minutes.
Now on the lowest speed, add in 1 and 1/2 cups of the flour. The dough will be quite soft.
Dump all of the dough out onto a well-floured board (use some of the remaining flour that you first measured out, starting with about 1/2 a cup and adding more as needed).

Flour your hands and knead the dough until it's smooth and elastic. By the time you're done it should feel tacky but not sticky. This will take about ten minutes if you knead energetically and maybe up to 15 if you knead more gently. Add just enough of the remaining flour to keep the dough from sticking to your board and to your hands.
Put the dough into a large, clean mixing bowl that's been sprayed with vegetable spray, oiled, or greased with shortening. Turn the dough over so it's lightly coated. Cover the bowl with plastic wrap that's also been greased, and cover the whole thing with a dish towel. Put the bowl in a warmer-than-room-temperature spot. Let the dough rise for about an hour, until it's doubled in size.
On a very lightly floured surface, dump out the dough and push on it with your palms/knuckles to deflate it. Invert your bowl and use it to cover the dough; let the dough rest like that for 10 minutes. Using a bench knife, or a sharp chef's knife, divide it into twelve equal pieces (they will probably weigh around 4 oz. each, more or less). Shape each piece into a ball, being sure to pinch tightly closed any seams on the bottoms. Cover one large or two regular size baking sheets with parchment paper and place the balls on them, about two inches apart. Cover the balls with sprayed/greased plastic wrap. Lightly cover them with a dish towel and put them in a warm spot to rise.
Preheat your oven to 400 degrees. Spread a layer of poppy seeds on a tray. Whisk the egg white and 1 tablespoon water in a small bowl. Have a pastry brush standing by.
Once the dough balls have risen for about 30 minutes, until almost doubled, brush the tops of all of them with the egg wash. Then, one by one, gently pick them up and dip them in the poppy seeds. Set them back on the parchment. Using a baker's lame or a razor blade, carefully cut five small slashes on each dough ball, starting from the center and moving outward, creating a spiral design on the top of each one. Don't cut too deeply, but don't be too timid either; try to cut about half an inch deep.

Bake in the middle of the oven. As soon as you put the dough in, quickly mist some water into the oven as well (be careful not to aim water at the lightbulb!). Bread dough likes a steamy atmosphere.
Bake for approximately 20 to 25 minutes. The rolls should be golden brown, with slightly darker bottoms, and their internal temperature should be at least 190 degrees (up to maybe 210). Let the finished rolls cool on a rack.
These freeze well, and also make great hamburger buns.

(If you'd like to comment on this post, or to read any existing comments, please click on the purple COMMENTS below.)
Wednesday, January 9, 2013
Chicken Cutlet Parmigiana (Pollo alla Parmigiana)

I don't know that I have seen this in Italy. I am almost sure it's Italian-American. How it evolved is questionable. I am sure it was all because of leftovers. There was always leftover sauce, leftover mozzarella cheese from the weekend, along with plenty of Parmigiano cheese in our kitchen. Chicken breasts, pan fried, were a popular item growing up in many Italian-American households. A little lemon squeezed on top is all you needed. Many never made it to the baking dish as we would steal some as my Mother fried away. It was always a favorite among the children. It remains today, a very popular item, both in kitchens around the globe and in many family restaurants. It's not difficult at all to make. I wonder why we don't make it more often? A little goes a long way here. Here is my mother's version and it might have been your Mom's version too. Enjoy! Buon Appetito
Servings for 6 people:
2 pounds of chicken breasts, boneless, pounded thin. Cut into even 4 inch pieces
4 eggs beaten (for each additional egg add one tablespoon Parmigiano Cheese. Just in case you need extra).
3 tablespoons whole milk
3 cups meatless tomato sauce leftover or made fresh
2 teaspoons of salt
2 teaspoons of pepper.
4 tablespoons Parmigiano Reggiano cheese plus additional 4 tablespoons for baking dish
4 cups of unseasoned bread crumbs
3 large plates or dishes/ one for your egg mixture, one for your bread crumbs and one for your chicken (this is just to make it easier for you to prepare for your frying).
Skillet for frying
About 2 cups frying oil. I prefer Sunflower or any vegetable oil
Assemble your ingredients:

Method:
Pound your chicken pieces thin and set aside. Add about a teaspoon of salt and pepper to your chicken. Mix your eggs, Parmigiano and milk in your baking dish. Carefully, begin heating some frying oil in a large skillet. You want your oil heated to medium/high. Your oil should be enough to come up the size of the pan, about an inch. You don't want to much, as you will be turning them rather quickly as they turn golden. Carefully begin coating your chicken. First in your egg then bread crumbs, then repeat. This will ensure a thick coating. Carefully drop a few bread crumbs in your hot oil. If the oil sizzles it's ready. Carefully place your chicken in the pan. The chicken will cook quickly. Turn it only once.

Drain the chicken on paper towels. Continue this method until all your chicken is cooked. It just needs a few minutes on each side.
Cook or heat your basic tomato sauce. If you are making this fresh, you will need to make it ahead or it will delay your assembly. I had to make mine fresh. You will need:
2 cans, 14oz diced tomatoes and their juice ( you will lose some volume/liquid while this cooks and reduces. You should have around 3 cups sauce).
3-4 tablespoons of olive oil
1/4 cup diced onion
2 tablespoons carrot
2 tablespoons celery
one teaspoon salt
one teaspoon pepper
One cup of red wine

Heat your oil in a pot enough to accommodate your sauce. Add your onion until fragrant. Add your celery and carrot, salt, pepper and mix until fragrant. Just takes a few minutes. Carefully add your tomatoes and wine. I like to add a pinch of nutmeg. This is optional. Cook for 15-20 minutes on medium/low or until the oil forms a ring around the sauce and your sauce has thickened. Turn off the heat and set aside.
Add several tablespoons of sauce on the bottom of your baking dish.
Place your cooled, chicken pieces into your baking dish. Fill up the pan. Preheat your oven to 375F.
Continue your assembly by placing sauce all over the tops of your chicken. Then sprinkle mozzarella cheese evenly over the tops along with several sprinkles of Parmigiano Cheese.

Place into your preheated oven, covered with foil for 15-20 minutes until your cheese has melted and all your ingredients have merged into one dish.

Let rest about 10 minutes and serve hot with crusty bread

Buon Appetito!
Pasta with Broccoli

Servings for 6 people:
1 pound or so Broccoli florets, cleaned dried and set aside
1/4 cup olive oil
One large skillet (enough to hold your pasta when cooked)
3 cloves of garlic, diced
one teaspoon of hot pepper flakes
two teaspoons of anchovy paste or one anchovy
One pound of Pasta of your choice.
Several tablespoons of salt (2 for your pasta water), one for your Broccoli).
This is a wonderful, stand alone dish, that is very satisfying. Place a large, 8quart pot, filled with water on to boil. Add 2 tablespoons salt and bring to a boil. Blanch your Broccoli florets in the boiling water. Cook for approximately 3 minutes. Remove and set the broccoli aside to drain. Be sure and reserve your water as you will re-use this same pot to cook your pasta later. Add more water if necessary.

In the meantime, heat your oil in your skillet on low. Add your diced garlic, red pepper flakes and anchovy paste. When you begin to smell your ingredients heating, mash them some with a wooden spoon. Be careful, not to burn anything, as you just want to oil to be infused and flavored. Turn your heat up and add your Broccoli Florets.

Carefully, mash or cut your Broccoli florets in the pan. Using your wooden spoon, mix your ingredients in the pan so that your Broccoli is well coated. In the meantime, when your water is boiling again, add your pasta. Cook your pasta to al dente. While your pasta is cooking, your Broccoli should continue to cook for 5 minutes more. The Broccoli should be soft. At this point, take a cup of your pasta water and add it to your Broccoli. This cooking method, will help your Broccoli adhere to your pasta when mixed. The starch from this addition will help the Broccoli develop into a nice creamy, consistency. Boil away some of the liquid until just a few teaspoons is left in the pan.

Drain your pasta and toss in the pan with the Broccoli. Add more olive oil if necessary to the dish before serving.
Buon Appetito!
Subscribe to:
Posts (Atom)